Thursday, May 31, 2012

Cookies & a Tray

Tonight I'm heading to my friend's house for "Girls Night In".  I am so looking forward to spending time with my close friends.  I usually take a dessert, and tonight is no different.  Because I didn't have time to shop I made do with what I had at home, which are ingredients to make chocolate chip cookies.  But of course!  You can't go wrong with chocolate chip cookies...oh and brownies...a nice cheesecake is always good....and let's not forget cupcakes....oh! cake balls!...OK, I'll stop.  So, I made my favorite chocolate chip cookies but decided to add some cardamom spice to them.
 Here's the recipe:
adapted from Ghiradelli  chocolate chip cookie recipe

2 1/4 c. flour
1 tsp. baking soda
1 tsp. salt
1 1/2 tablespoon ground cardamon
1 cup (2 sticks) softened butter -- I used 1 stick salted and 1 stick unsalted as that is what I had
3/4 cup sugar
3/4 cup packed brown sugar
1 tablespoon vanilla (I used vanilla bean paste)
2 large eggs
1 bag Ghirardelli dark chocolate chips

Directions:
1.  Preheat oven to 375 degrees
2.  In a bowl combine flour, baking soda, salt, and cardamon -- stir together until well incorporated and  set aside.
3.  Cream together butter and sugars until smooth. (I used KitchenAid mixer for parts 3 - 6)
4.  Add vanilla and then eggs one at a time and beat well.
5.  Gradually add the four mixture.
6.  Add the chocolate chips and stir together, by hand.
7.  Drop dough by rounded tablespoons 2 inches apart onto a cookie sheet.
8.  Bake 9 to 11 minutes until golden brown (mine were done in 9 minutes).
9.  Remove from oven and leave cookie sheet for about 2 minutes.
10.  Place cookie sheet on wire rack to cool completely.


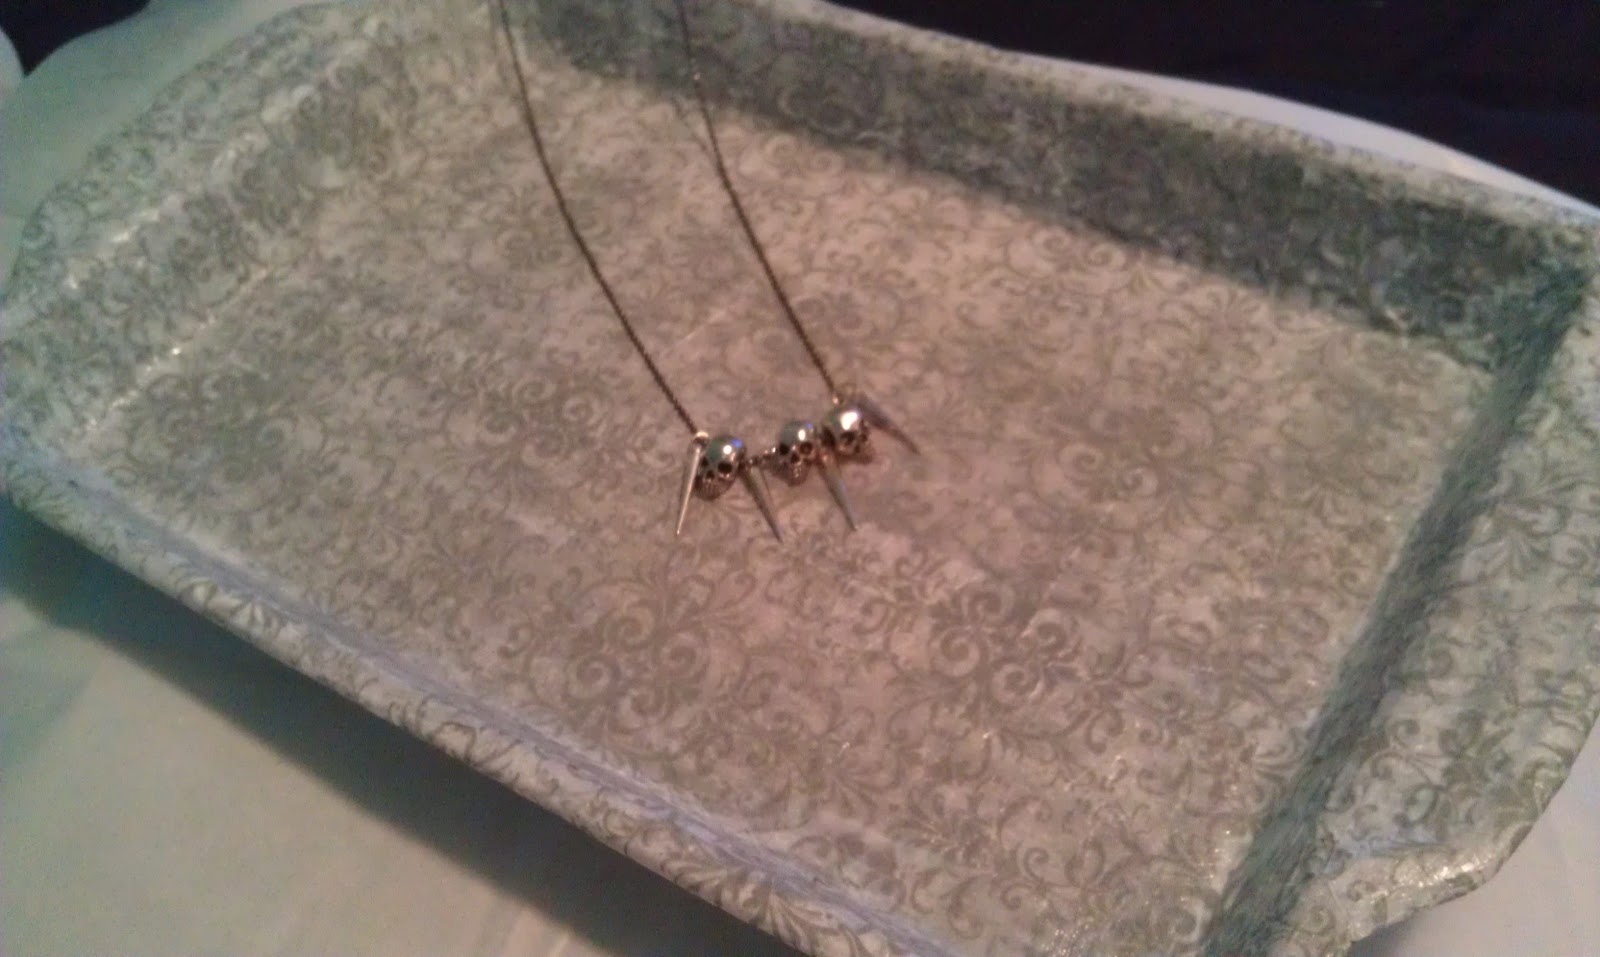
I took the cookies to my friend's house on this tray....
As you can see you can also use the tray to display jewelry!


It was super easy to put together.  Here's what I used....

Plastic Tray -- $1 from Dollar Tree store
Tissue Paper -- $1 from Dollar Tree store
Modge Podge -- already had

So, for $2 have a nifty tray I can use for baked good (just added coffee filters in between the food and the tray).  

Until next time....
Luna wearing her new outfit her Aunt Nora gave her.  


Friday, May 25, 2012

Clutch....

I've been gone for a while...not sure if anybody noticed.  No emergency, nothing bad happened...just took a break.  I wanted to concentrate on my Etsy shop but I think I stressed myself out over it.  I couldn't think of what to make.  I kept on second guessing myself, and wondering how to market it and how to get more people interested that in the end I ended up doing nothing.  {{big sigh}}  I decided that maybe if I bought some new supplies it may recharge me, so I'm waiting for that to come.  However, yesterday while shopping at Marshall's I came across this placement.
I thought it was perfect for a "placemat clutch".  I've seen countless tutorials out there for them but the ones I've seen involved sewing.  I still wanted to make one but I am too intimidated by my sewing machine (don't ask why...but I've taken control and signed up for sewing lesson next month!).  I figured at $1.99 I would buy it and save it for later.  When I got home I thought, "hey, why not use super glue?!?!"  Why not indeed!  I figure if it didn't work I wasn't out much money.  And guess what it worked!

I added a rhinestone (it was part of an earring that died) and, since it was last minute, I added velcro for closure.  Basically I glued the sides together, clipped them in place to allow the glue to dry and then I glued the velcro and the rhinestone.  Took me like 5 minutes.  I love the end result.
front of clutch

inside of clutch
My mom thought I had just bought it at Marshall's so I guess it looked good. Vivian asked if I was going to sell it. Haha!  I guess she liked it also.  I'm happy that after weeks I made something...even if it was super easy.  

Until next time....
Luna about to chomp on her favorite treat. 
 

Thursday, May 3, 2012

Clay Feathers

So, I was checking out Craftgawker and saw this lovely feather made out of clay.  They were made by Michelle from The Gilded Hare (wonderful blog!).  I loved the look of the clay feathers, and since I had clay on hand I thought I'd give it a try.

Although hers looks a lot better, I don't think mine turned out so bad.  I think with some more practice they may end up looking a lot nicer.  Vivian liked them and wore the teal one today. :)

Here's the how... all you  need to do is shape the polymer clay into the size of feather you want (mine were about 2x2 inches) and form the quill by pressing down on either side with a toothpick or, like I did, use the end of bobby pin.

and then with the same toothpick or bobby pin make lines down on each side.
Don't forget to add a hole so that you can attach chain, rope, leather cord, etc.
Then bake for the amount stated on clay package.  I added varnish after baking and done...

 Until next time....

I told Luna I wanted to take a photo and she immediately sat down! 

Wednesday, May 2, 2012

A hike & a slice of pie....


Went for a hike with my guy Saturday morning.   The weather was perfect and I captured the following photos...


One part of the path was lined with cactus on either side...I walked very carefully.


Can you see the angry face?
And what do you do after a hike…why eat Strawberries & Cream Cheesecake of course!


I got the recipe from Martha Stewart via the Delish website.  I made one change (well, some of the measurements for things were changed, oh and maybe one other ingredient...but that's it!)  in that I used these cookies for the crust…


Oh my dang!  It was delicious!  It does take some work to make but so worth it.  Try it, you’ll like it!

Here’s what I used:

1 pound or so of hulled strawberries
3 tbs. light corn syrup
1 cup finely ground Trader Joe's Cookie Thins Toasted Coconut 
1 cup plus 3 tbs. granulated sugar
3 tbs. melted unsalted butter
3 (8 oz.) cream cheese – at room temperature
¼ tsp. salt
1 tbs. vanilla bean paste
2 large eggs – at room temperature
8 oz. mascarpone cheese – at room temperature

Directions:
1.  Preheat over to 300 degrees. 
2. Place strawberries on a baking sheet in a single layer and drizzle corn syrup.  You will need to make sure the strawberries are coated with the corn syrup.
3. Bake for about 1 ½ hours until strawberries turn deep red and syrup thickens (I didn’t see any syrup so I thought I screwed something up, but it worked out).
4.  Let strawberries cool completely and then put in a bowl and mash them up.
5.  Turn the oven up to 350 degrees.
6.  Add 3 tbl. sugar and melted butter to the cookie crumbs and stir until combined.
7.  Press mixture, in an even layer, into the bottom of a 9-inch spring-form pan  and bake for 10 minutes until crust has darkened and firm to the touch.  Let cool over wire rack.
8.  Turn down oven to 325 degrees.
9.  Add cream cheese to bowl of electric mixer that has been fitted with paddle attachment and mix until creamy for approximately 2 minutes.  Make sure to scrape down the sides of the bowl.
10.  Add gradually remaining sugar (1 cup) and salt and mix until incorporated. 
11.  Add the eggs one at a time, and mix well after each addition.  Make sure to scrape down the sides of bowl.
12.  Mix in vanilla bean paste and mascarpone until very creamy and there are no lumps remaining – approximately 3 minutes.
13.  Add 5 cups of cream cheese mixture to the mashed strawberries.
14.  Stir to combine and pour mixture on top of crust and smooth with a spatula.
15.  Add dollops of the plain cream cheese mixture on top, and smooth with a spatula
16.  Wrap the exterior of the spring-form pan in 2 layers of foil and set in a large roasting pan.
17.  Add boiling water until water reaches halfway up the sides of the spring-form pan. 
18.  Bake until set – about 1 hour 10 minutes. 
19.  Remove spring-form pan from water bath and transfer to wire rack to cool completely.
20.  Refrigerate until cold – at least 4 hours (I left mine overnight)
21.  Cut a slice, taste it, eat that slice, and try not to go back for seconds, thirds…all of it. J

As I said lots of work, and you really need to read the directions before trying (I didn’t and so got frustrated when I was ready for baking it and learned I had to boil water first!).  The hardest part for me was putting the foil on the sides...it wasn't the prettiest site.  I’m sure there is an easier way!  Oh, and it also would have helped if I put the stupid spring-form pan together right.  I would have inserted a photo of the complete cheesecake, but parts of it didn't look so pretty.  It didn't affect the taste though! 

Until next time!


Tuesday, April 24, 2012

Strawberries....

It's strawberry season.  I dig 'em, but I must admit I don't like eating them plain.

They look innocent enough.
I hate biting into one and finding them not sweet...bitter yuckiness.  It turns me off strawberries for a while.  So, I bought a pound of strawberries thinking I'd use them for shakes, but while at Sprout's store I found these...
You know who else liked these?  Yep, Ms. Luna.  Of course, I only gave her a tiny bit.
I figured I'd add some strawberries and whipped cream on top and make a delectable dessert.  
Ugh! The background is distracting from the delectableness of my dessert!  

Here's what I used:

For strawberries:
1 pound fresh strawberries, hulled and sliced
2 tbs balsamic vinegar
1/4 cup sugar

Mix all ingredients together, cover and let sit at room temperature for about an hour.

Sliced strawberries with sugar on top
 For the whipped cream:


1 cup whipping cream + 1 tbs clear vanilla extract + 1/4 cup sugar =  yummy whipped cream
I added all ingredients to standing mixer (fitted with wire whisk attachment) and blended away for about 4-5 minutes (start off at slow speed....unless you enjoy having milk splattered everywhere...increase to high as it comes together) until form peaks.  

I cut the mini angel food cake in half, added the strawberry mixture then a generous dollop of whip cream, and finished with the top of the mini cake.  


Until next time!

Luna patiently waiting for more angel food cake.  


Wednesday, April 11, 2012

Nails!


Did I mention before that Vivian loves painting her nails (and anyone else that will ask)? 

She has a box full of nail polishes.
This past week she “created” her new nail look and wanted to do my nails the same.  Of course I couldn’t deny her and below are the results….

Pretty nails!
What she used:

1. Nail Polish – I forgot what color this is actually called but it’s like a baby blue
2. Nail Polish Strips (such as Sally Hansen, Salon Effects Real Nail Polish Strips) – she cut them into shapes to fit the nail
3. Top Coat --  Used to seal the strips so they don't peel off.

Vivian hard at work.
She said the nails looked “old fashioned”.  Yep! They sure did.  I love that she gets creative with her nails.

Until next time!

Luna slept the whole time...she was tired after her haircut. She did have two bows on but took one off.  


Tuesday, April 3, 2012

International sandwich...


On Saturday I visited, Aria, the new international market that opened nearby.  It is full of good stuff from different countries.  I mainly went there to pick up some naan bread.


It is amazingly good and best of all they bake it while you wait.  I wish I would of thought to take pics but I was too enthralled by the process to think about whipping out my smart phone.  Basically the baker man adds water to a metal table then adds sesame seeds and grabs a handful of dough, he then stretches it out and kind of slaps it silly.  I believe the slapping it so take out any air bubbles.  He then lays it on a big spatula and put it into a conveyer type oven and stretches it out.  It’s about 5 feet in length!  And oh man does it taste good…all warm and doughy and goodness and dang! I stopped myself from eating it right then and there….I mean how embarrassing would that have been!  From the bread section I moved on to where the cheeses are located…conveniently right next to the bread area.  I think I tasted all the cheeses they had but settled on two Mexican cheeses…queso fresco (fresh cheese…more of a “crumbly cheese”…so yummy!) and panela (also a “fresh cheese” but its milder and when heated its creamy and soft.)
My mom calls it "quesadilla cheese".
For lunch on Sunday I made grilled cheese sandwiches using the items purchased from Arias and stuff already had in my fridge.  I made two variations…

1st:
2 slices of  prosciutto (the saltiness of it went well with the mild flavors of the panela cheese.
2 slices of panela cheese
1 tsp. of mayonnaise (I added hummus to mine but mom & Vivian aren’t into hummus so more for me!)
1-2 tomato slices
baby spinach
Naan bread – I had Vivian cut about 8” square from the long naan bread and then folded that to make each sandwich about 4”

Spread mayonnaise/hummus on naan bread, add cheese, tomato, meat, spinach, and cheese. Lay sandwich on pan or grill (I used my little George Foreman Grill).  I sprayed the grill with butter flavor Pam prior to adding the sandwich.
The "grill" is so small only one fit at a time.
2nd:
2 slices of turkey deli meat (if thinly sliced add more)
1 slice of chipotle cheddar cheese
1 slice of fontina cheese
1 tsp. of mayonnaise
Naan bread – I had Vivian cut about 8” square from the long naan bread and then folded that to make each sandwich about 4”

Spread mayonnaise on naan bread, add chipotle cheese, tomato, meat, spinach, and fontina cheese.  Lay sandwich on pan or grill (I used my little George Foreman Grill).  I sprayed the grill with butter flavor Pam prior to adding the sandwich.

We had a great and filling lunch and by Sunday night most of the nann bread was gone!

So good! I  wish I had one of these for lunch today. 
 Until next time,